File Setup
Understanding Options for Saving to PDF
Laying Out Documents for Print
Creating and Exporting Bleeds Using Adobe InDesign
Using Adobe InDesign's Print Booklet Plug-In
Creating a Cutting Path for the Roland
Creating and Exporting Bleeds Using Adobe InDesign
This document is intended to help you prepare your files for all print jobs. This only covers the set-up for generic bleed settings. Your file may require more advanced settings for proper output.
Alternative Resources
For a more in-depth understanding of this topic, we recommend the following School of Print Media classes: Print Production Workflow and Digital Foundations. If you have questions, please consult your instructor or a DPC Customer Service Representative (CSR).
Important Facts
“Bleed allowance” is used by designers when they intend to have any printed element extend to the edge of a cut document. Bleeds allow for deviations in cutting by extending each one of those elements to about 0.125" beyond the document edge.
For example, in the DPC, our devices cannot print full bleed on a letter size sheet unless your document size is smaller than 8.25" by 10.75". To work around that, you should print your document on a 11" by 17" (US Tabloid) or 12" by 18" sheet and trim it down to 8.5" by 11" (US Letter).
When your document is trimmed down to 8.5" by 11", anything beyond the document size will be trimmed off. By extending the boundaries of your graphic elements and images, we can make sure that you will not end up with any unseemly white gaps due to errors in the cutting process.
This document outlines the steps for setting up an for an 8.5" by 11" document with bleed that will be printed on a tabloid (11" by 17") sheet of paper. To produce a bleed for an 11" by 17" document, you must print on a 12" by 18" sheet.
Creating an InDesign Document with Bleeds
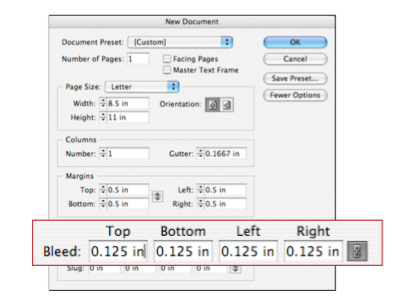
Figure 1: Setting the bleed options
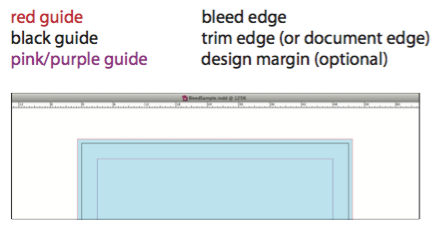
Figure 2: Creating a bleeding design element
Exporting a PDF Document with Bleeds
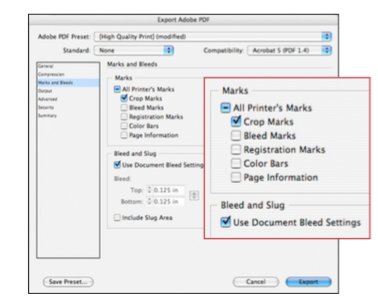
Figure 3: Setting the bleed and crop marks in a PDF
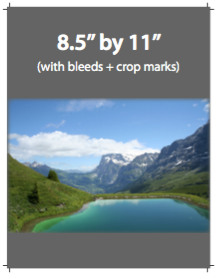
Figure 4: Example of a PDF exported with bleeds and crop marks