File Setup
Understanding Options for Saving to PDF
Laying Out Documents for Print
Creating and Exporting Bleeds Using Adobe InDesign
Using Adobe InDesign's Print Booklet Plug-In
Creating a Cutting Path for the Roland
Creating a Cutting Path for the Roland Soljet IIIXC-540
This user guide is intended to show you how to setup a le for automatic cutting on the DPC’s Roland SolJet wide-format printer. This demo uses Adobe Illustrator CS3, but the same process can be done in older versions of Illustrator, Adobe InDesign, QuarkXPress, or any application where you can de ne custom spot color swatches.
Creating the CutContour Swatch
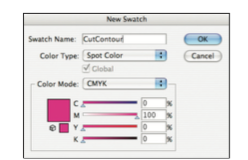
Figure 1: Saving the CutContour swatch
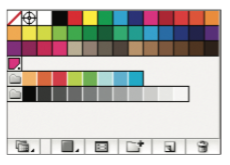
Figure 2: Note the spot swatch (4th row)
Defining the CutContour Area
As with all mechanical equipment, the cut controls are not perfect and there may be a slight alignment shift. If you are planning to have full bleed stickers, incorporate a bleed of at least 0.125”. For more information on bleed, refer to Creating and Exporting Bleeds Using Adobe InDesign.
Figure 2: Note the spot swatch (4th row)

Figure 2: Note the spot swatch (4th row)
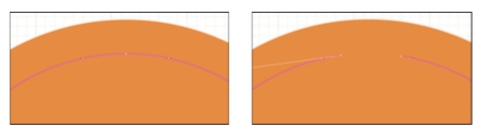
Figure 5: Example of a closed path (left) versus an open path (right)
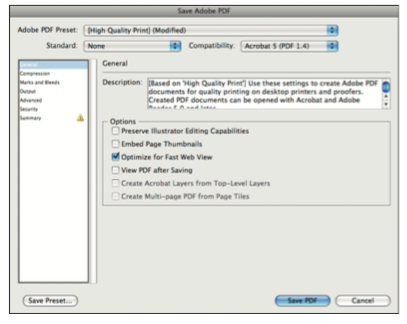
Figure 5: Example of a closed path (left) versus an open path (right)