Laying Out Documents for Print (Imposition)

This document is intended to help you prepare your files to print in the most logical and economical manner. This document only covers imposition (the layout of documents for print) in its most basic form. It primarily focuses on digital printing imposition.

Alternative Resources

For a more in-depth understanding of this topic, we recommend the following School of Print Media classes: Print Production Workflow and Digital Foundations. If you have questions, please consult your instructor or a DPC Customer Service Representative (CSR).

Important Facts

In the graphic arts industry, laying out multiple pages for print is called imposition. Generally speaking, imposition is the arrangement of documents on a printed sheet. Imposition is often used to make the most economical use of the sheet or for generating a proper page sequence (depending on binding type). Imposition should always be considered during file creation because it is highly influenced by sheet size, print device, and finishing methods.

"Multi-Up" Form Imposition

Using a Page Layout Application

A multiple-up form refers to placing more than one copy of the same design on a page. In the DPC, a commonly imposed form is a sheet of business cards. See Figure 1 for an example.


guide

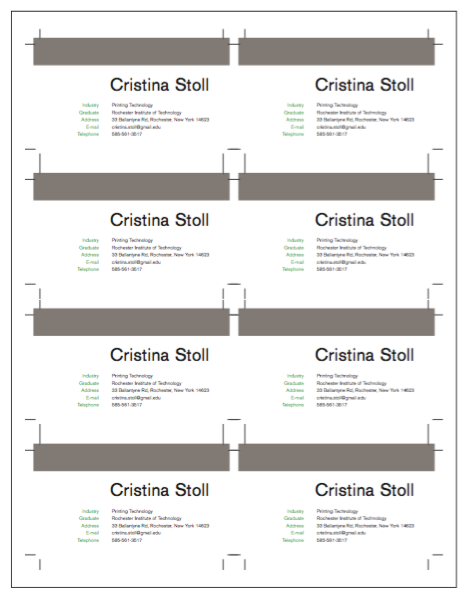
Figure 1: Multiple business card files imposed onto a letter size sheet


If you do not have a professional multi-up imposition application (i.e. Kodak Preps Ganging) page layout applications (i.e. InDesign, Quark XPress) can be used to manually impose documents. For documents with multiple pages and more complex impositions, this process may become tedious. However, for “multi-up” (e.g. multiple copies on one sheet) impositions, they will suffice. In this instructional section, most examples will be displayed using Adobe InDesign.


Using a Page Layout Application

  1. Create a final high-resolution PDF of the file you want imposed (Figure 2). When necessary, including crop marks and .125" bleed (Figure 3). See the DPC User Resource entitled “Creating and Exporting Bleeds Using Adobe InDesign”.

  2. guide

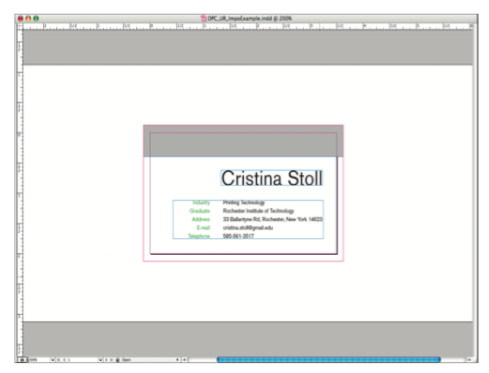
    Figure 2: InDesign file of a single business card with bleeds ready to export to PDF and then impose using InDesign


    guide

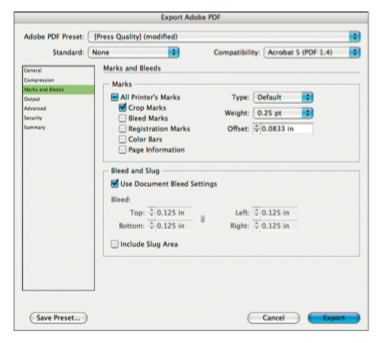
    Figure 3: PDF options for marks and bleeds


  3. Create a new document in any page layout application or Adobe Illustrator. The document size should be the size of your final output sheet (i.e. 8.5" by 11" US Letter, 11" by 17" US Tabloid, 12" by 18"). This final sheet should be large enough to fit multiple copies of the original file with space in between. (Figure 4)
  4. guide

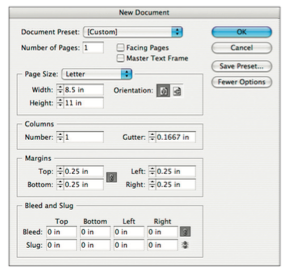
    Figure 4: New document options in InDesign


  5. Place your PDF into the new blank document (File → Place). If you are working with a multi-page PDF, and you wish to place a page other than the first page, be sure to check “Show Import Options” (InDesign) to reveal this feature.

  6. Duplicate the file you have placed or place other PDF files as desired.

  7. Be sure to account for the printer margin. Ask a CSR for the printer margin of any printing device. (Figure 5)

  8. guide

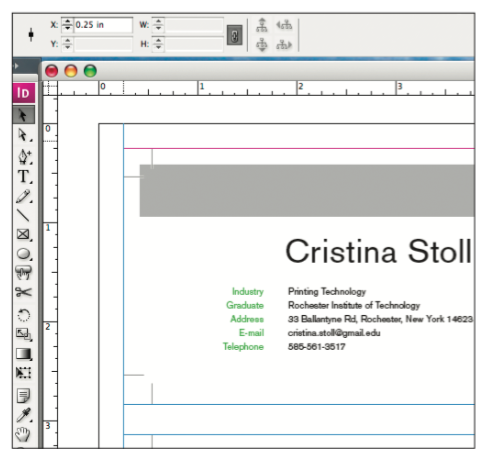
    Figure 5: Using rulers to make sure artwork stays within the printer margins


  9. Align items accurately. Use guides or grids in a high-quality display view to impose and align your items. (Figure 6) Remember, aligning your items is critical because this will allow the DPC to cut your documents more consistently. The application may offer a tool for this (i.e. InDesign’s Align and Distribute Objects palette).

  10. guide

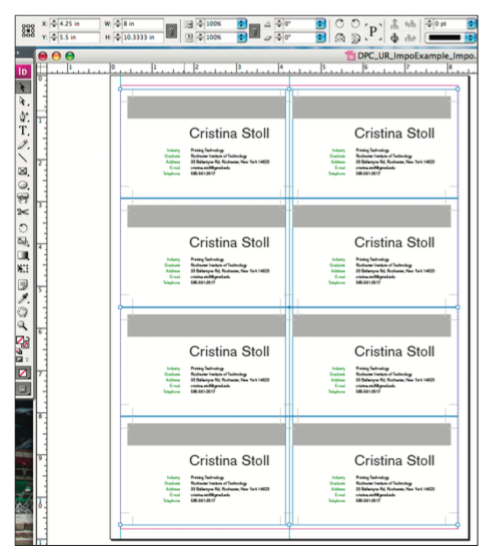
    Figure 6: Imposed business cards in InDesign ready to be exported to PDF, printed, and cut.


Using Adobe Illustrator to Add Crop Marks and Impose


Another simple option, if you are working with an Adobe Illustrator file to which you wish to add crop marks and place multiple times, is to use Illustrator itself. Here are some instructions on how to go about adding crop marks to your artwork and imposing multiple copies on one sheet:


  1. Create a new document. The document size should be the size of your final output sheet (i.e. 8.5" by 11" US Letter, 11" by 17" US Tabloid, 12" by 18").

  2. Place your Illustrator or EPS file into the blank document (File → Place). Duplicate this item or place more files.

  3. Be sure to, account for the printer margin. Ask a CSR for the printer margin of any printing device and remember to leave an adequate amount of space.

  4. Align items accurately. Use guides or grids in a high-quality display view to impose and align your items. Remember, aligning your items is critical because this will affect how well your items are trimmed to final size. Illustrator offers a tool to help this called Align and Distribute Objects (Windows → Align). (Figure 7)

  5. guide

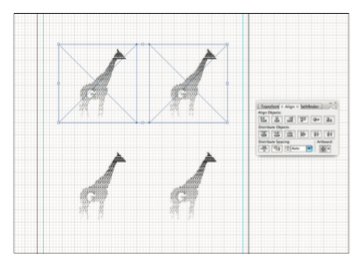
    Figure 7: Manual and automatic options for aligning artwork in Illustrator


  6. Add crops marks to any selected object by selecting Crop Marks under Filter → Illustrator Effects → Create. (Figures 8 and 9)

  7. guide

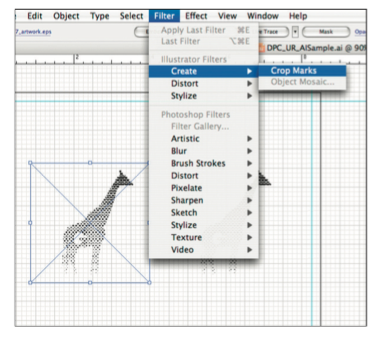
    Figure 8: Illustrator tool for creating crop marks within a document


    guide

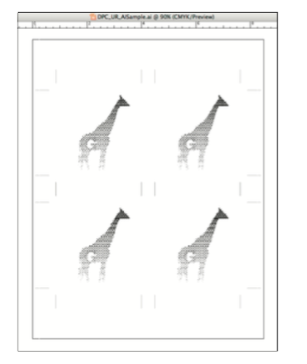
    Figure 9: Example of crop marks made in Illustrator on multiple objects


Advance Options

Using a professional imposition application, such as Kodak Preps Ganging, is much more accurate and reliable. However, these types of applications are not always intuitive for new users.


Please ask any available CSR for a demonstration on how to impose your “multi-up” imposition using Kodak Preps Ganging. Also, please note that this application is not available on all computers. Please consult with a CSR for help on this topic.

Imposition for Multi-Page Documents

Before imposing your multi-page document, you need to determine the page count, binding style, bleed, and printer margin.


Common Imposition Settings and Terms:


  • “2-Up, 4-Up, 8-Up”: These phrases refer to the number of alike images/documents on one side of a printed sheet. See Figure 2 (previous section) for an example of an 8-Up imposition.

  • Saddle-Stitch: This is a binding method of stapling sheets together at the spine (center, bound part of the book). Depending on the amount of bound sheets, the imposition may need to factor in “creep”. (See definiton of “creep” )

  • Perfect-Bound: This is a binding method where printed sheets have been ground at the spine and are adhered to the book’s spine by glue. Depending on the design, the imposition may need to include bleeds for items that crossover a reader spread.

  • Margins: This refers to the white space between the edge of the printed area and the edge of the media or copy on the page.

  • Gap: This setting applies to imposition styles that do not require the left and right pages to have touching spines, such as a wire or coil binding. The gap setting determines the amount of space between printed items on a sheet.

  • Bleed: This refers to printing that goes beyond the edge of the sheet after trimming. The bleed area is the extended image of the printed document that gives the DPC printer that small margin of error for shift between sheets and finishing inconsistencies. By US standards, bleeds are generally 1/8 of an inch (0.125") from where the cut is to be made.

  • Creep: Depending on the binding method, the inside pages of a set of folded pages may extend slightly beyond the outside pages. Using the “creep” setting can compensate for this by making the inner margin of the inside pages smaller.

  • Crossover: This term refers to a design element (graphic, image or text) that physically crosses over a reader spread. The imposition application will make a “crossover bleed” according to the designer’s numerical input.

Software Options for Imposing Multi-Page Documents

  • The list below is of available plug-in’s for creating impositions. They are all fairly similar in their options. For more information on using Adobe InDesign’s Print Booklet, see the DPC User Resource entitled “Using Adobe InDesign’s Print Booklet”.

  • Print Booklet (InDesign CS3) Location: File → Print Booklet Outputs: PDF file of imposition

  • Imposer (QuarkXPress) Location: File → Imposer Outputs: PDF file of imposition

  • Imposer (Acrobat) Location: File → Imposer Pro Outputs: PDF file of imposition

  • The above plug-ins are all great options for short-run, digitally printed books. However, for more advanced impositions for conventional printing applications, there are dedicated software applications for creating impositions, such as Kodak Preps.

  • Using a professional imposition application is much more accurate and reliable, although these programs come with a steeper learning curve.

  • Please ask any available CSR for information and demonstration on how to impose your document using any applications.

Get In Touch